Abstract #
Abstract works as a single source of truth for our design team’s work. We use it to version, manage, and collaborate on Sketch design documents. Follow the below steps to get started.
1. Create account #
First, you’ll have to create an Abstract account. To do so, sign up via the website. Once you’ve created an account, let us know via Duet Design System Slack and we’ll add you under the right organization.

2. Install Abstract and fonts #
To edit Sketch files in Abstract, you’ll need to download the macOS app. It’s not possible to edit or create Sketch files on Abstract’s web app, but other team members can view designs and provide feedback.
Before launching Abstract, you’ll also have to remove any local versions of Turva and LocalTapiola fonts. After removed, download and install fresh copies from Duet’s resources page. This is a necessary step in order to make sure everyone has the same font files installed.
3. Choose project #
In Abstract, you organize your Sketch files into Projects. Since our teams share these Projects, the way we divide them impacts the whole organization.
We’ve decided to group everything by platform. This means that we have separate projects for Web, iOS, and Android. Additionally, there’s a project for Duet’s Sketch Toolkit as it’s shared across all these platforms.

When you open Abstract, you land in “Projects” view that looks like the one above. Click to choose and open any of the existing projects.
4. Create Sketch file #
Once you’ve opened a project, click “Master” on the left sidebar and choose “Add file > Create Sketch File” from the view that open on the right. Now you can enter a name for the new Sketch file. We name all files following the below naming convention:
<Project> - <Feature Name>
Example 1: “Toivo - Pet Insurance Purchase”
Example 2: “Toivo - Sign Up Flow”
Once finished, click “Create Sketch File.” Your new Sketch file will now appear in the Files List of Abstract.
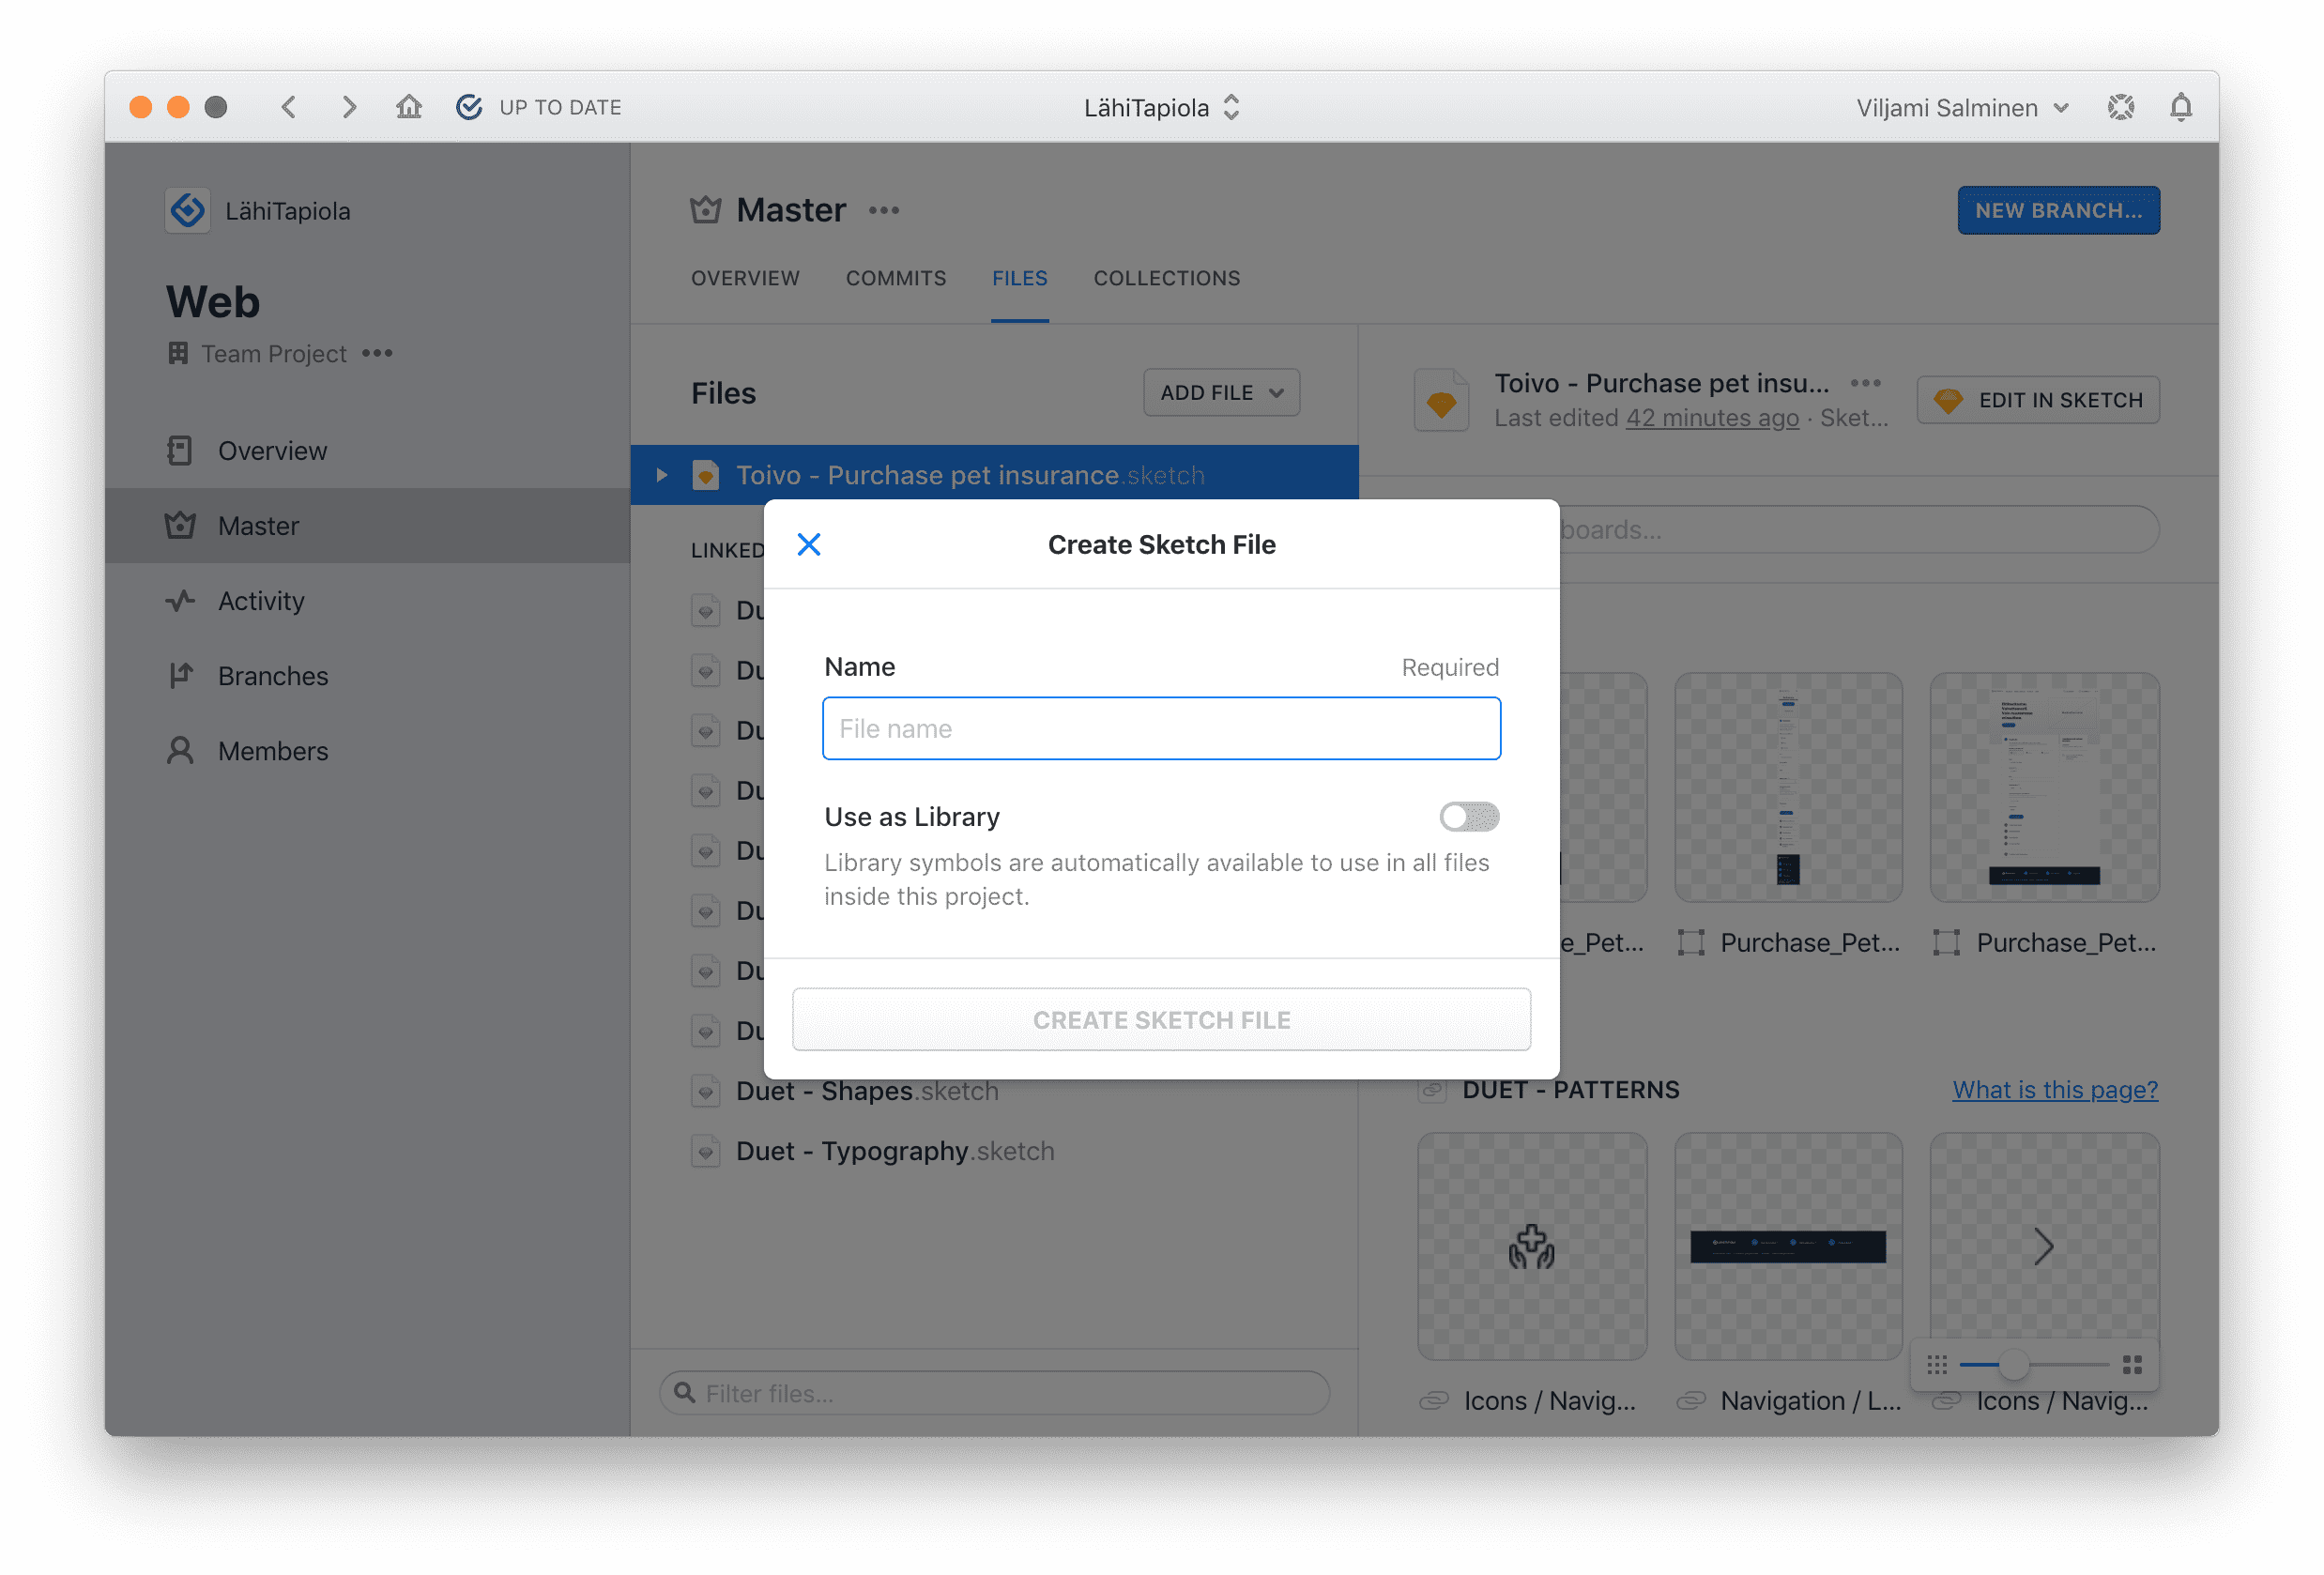
Files created in Master are considered your single source of truth. Each Project has a Master that can consist of one or several Sketch files. This way, everyone can look at the Master and use it as reference for their work.
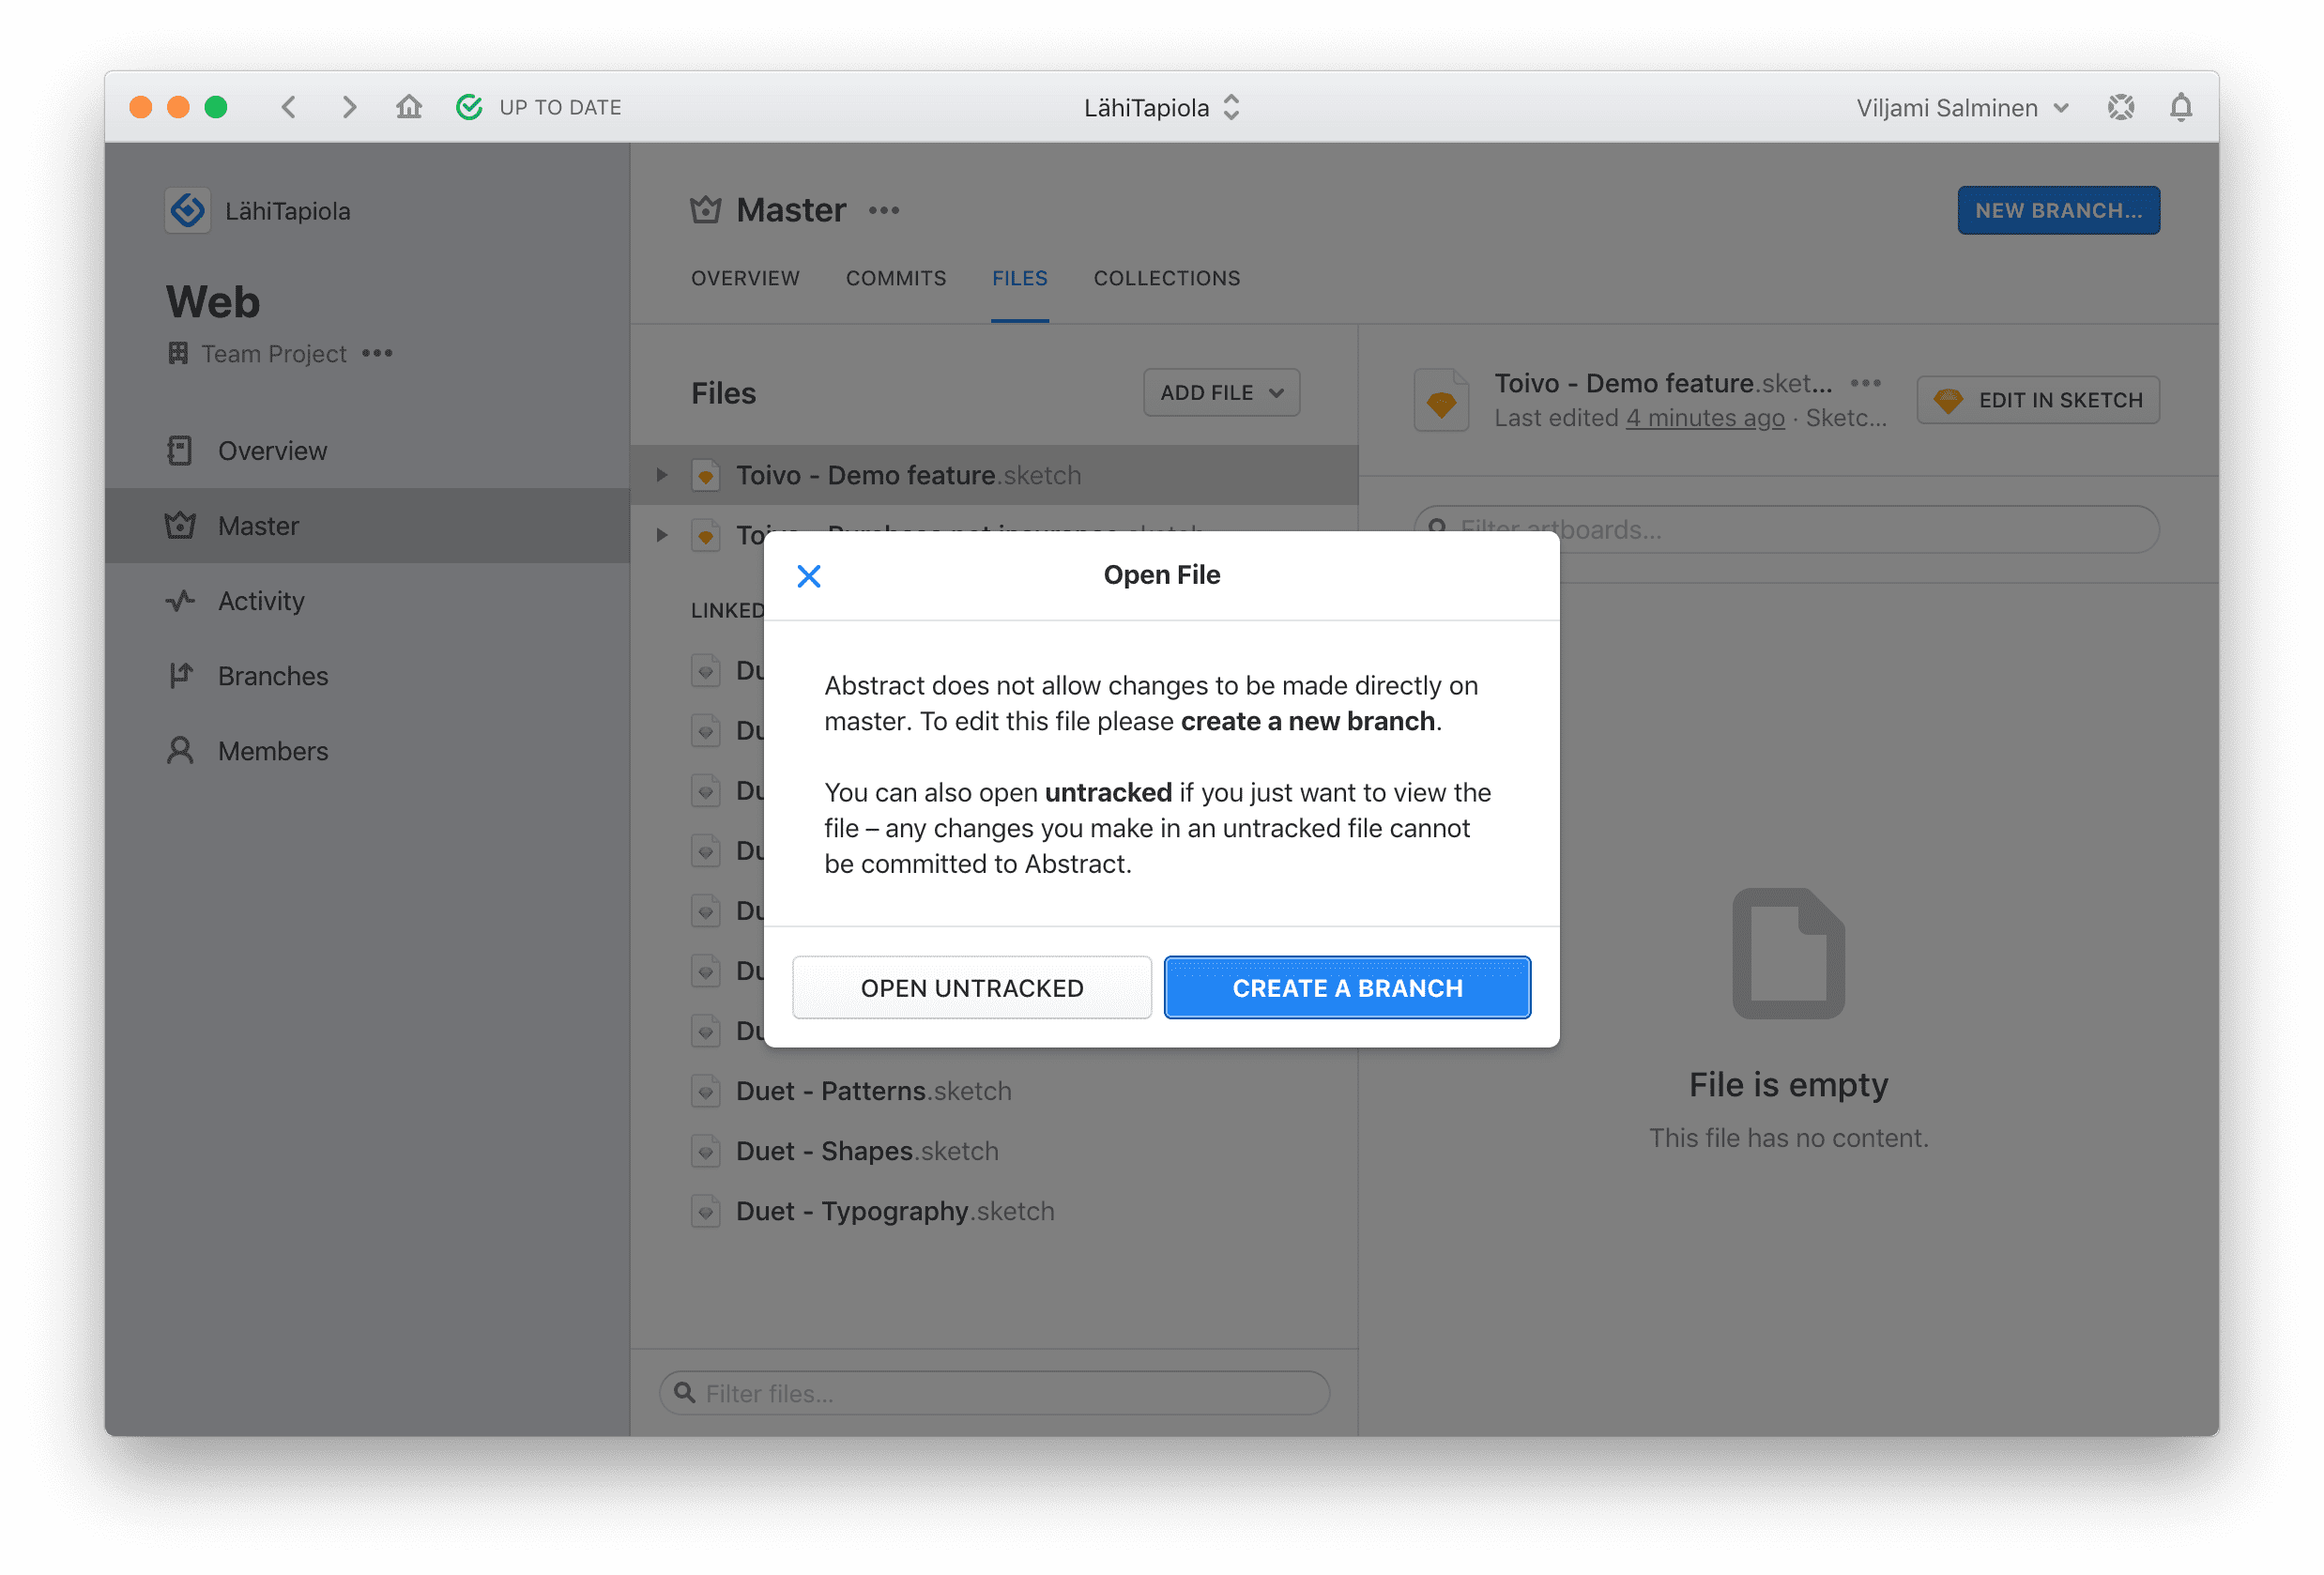
5. Edit Sketch file #
To begin designing, select your new Sketch file and click “Edit in Sketch.” At this point, Abstract will ask whether you want to open the file untracked or create a new branch.
Always choose “Create a Branch” unless you just want to view the file in Sketch without making edits or saving.
Branches allow you to make a copy of the Master file while still being connected to the Master. It’s a safe space to explore, create, and iterate, without worrying about losing your original file.
Once you’ve clicked “Create a branch” Abstract will ask you to name it. We name branches following the below naming convention:
<Feature/Fix> - <Feature Name/Fix Name>
Example 1: “Feature - Sign Up Flow”
Example 2: “Fix - Symbol Alignment Issues”
Once finished, click “Create Branch.” Your Sketch file will now automatically open in Sketch app, and you can start editing and saving your changes as you would normally.
6. Commit changes #
When you have made edits and saved them in Sketch, a horizontal bar will appear at the bottom of Abstract saying “uncommitted changes.”
A Commit is like a “super save” with context. When you Commit, you write a short description of the edits you made. This way, your team can look at your Commit history and know what changes were made, when, and why. Commit’s also allow give us the flexibility to restore a Project’s Master back to any previous Commit and try again.
We recommend committing several times a day.
When you click “Commit Changes…” a new view will open, allowing you to summarize what you did:
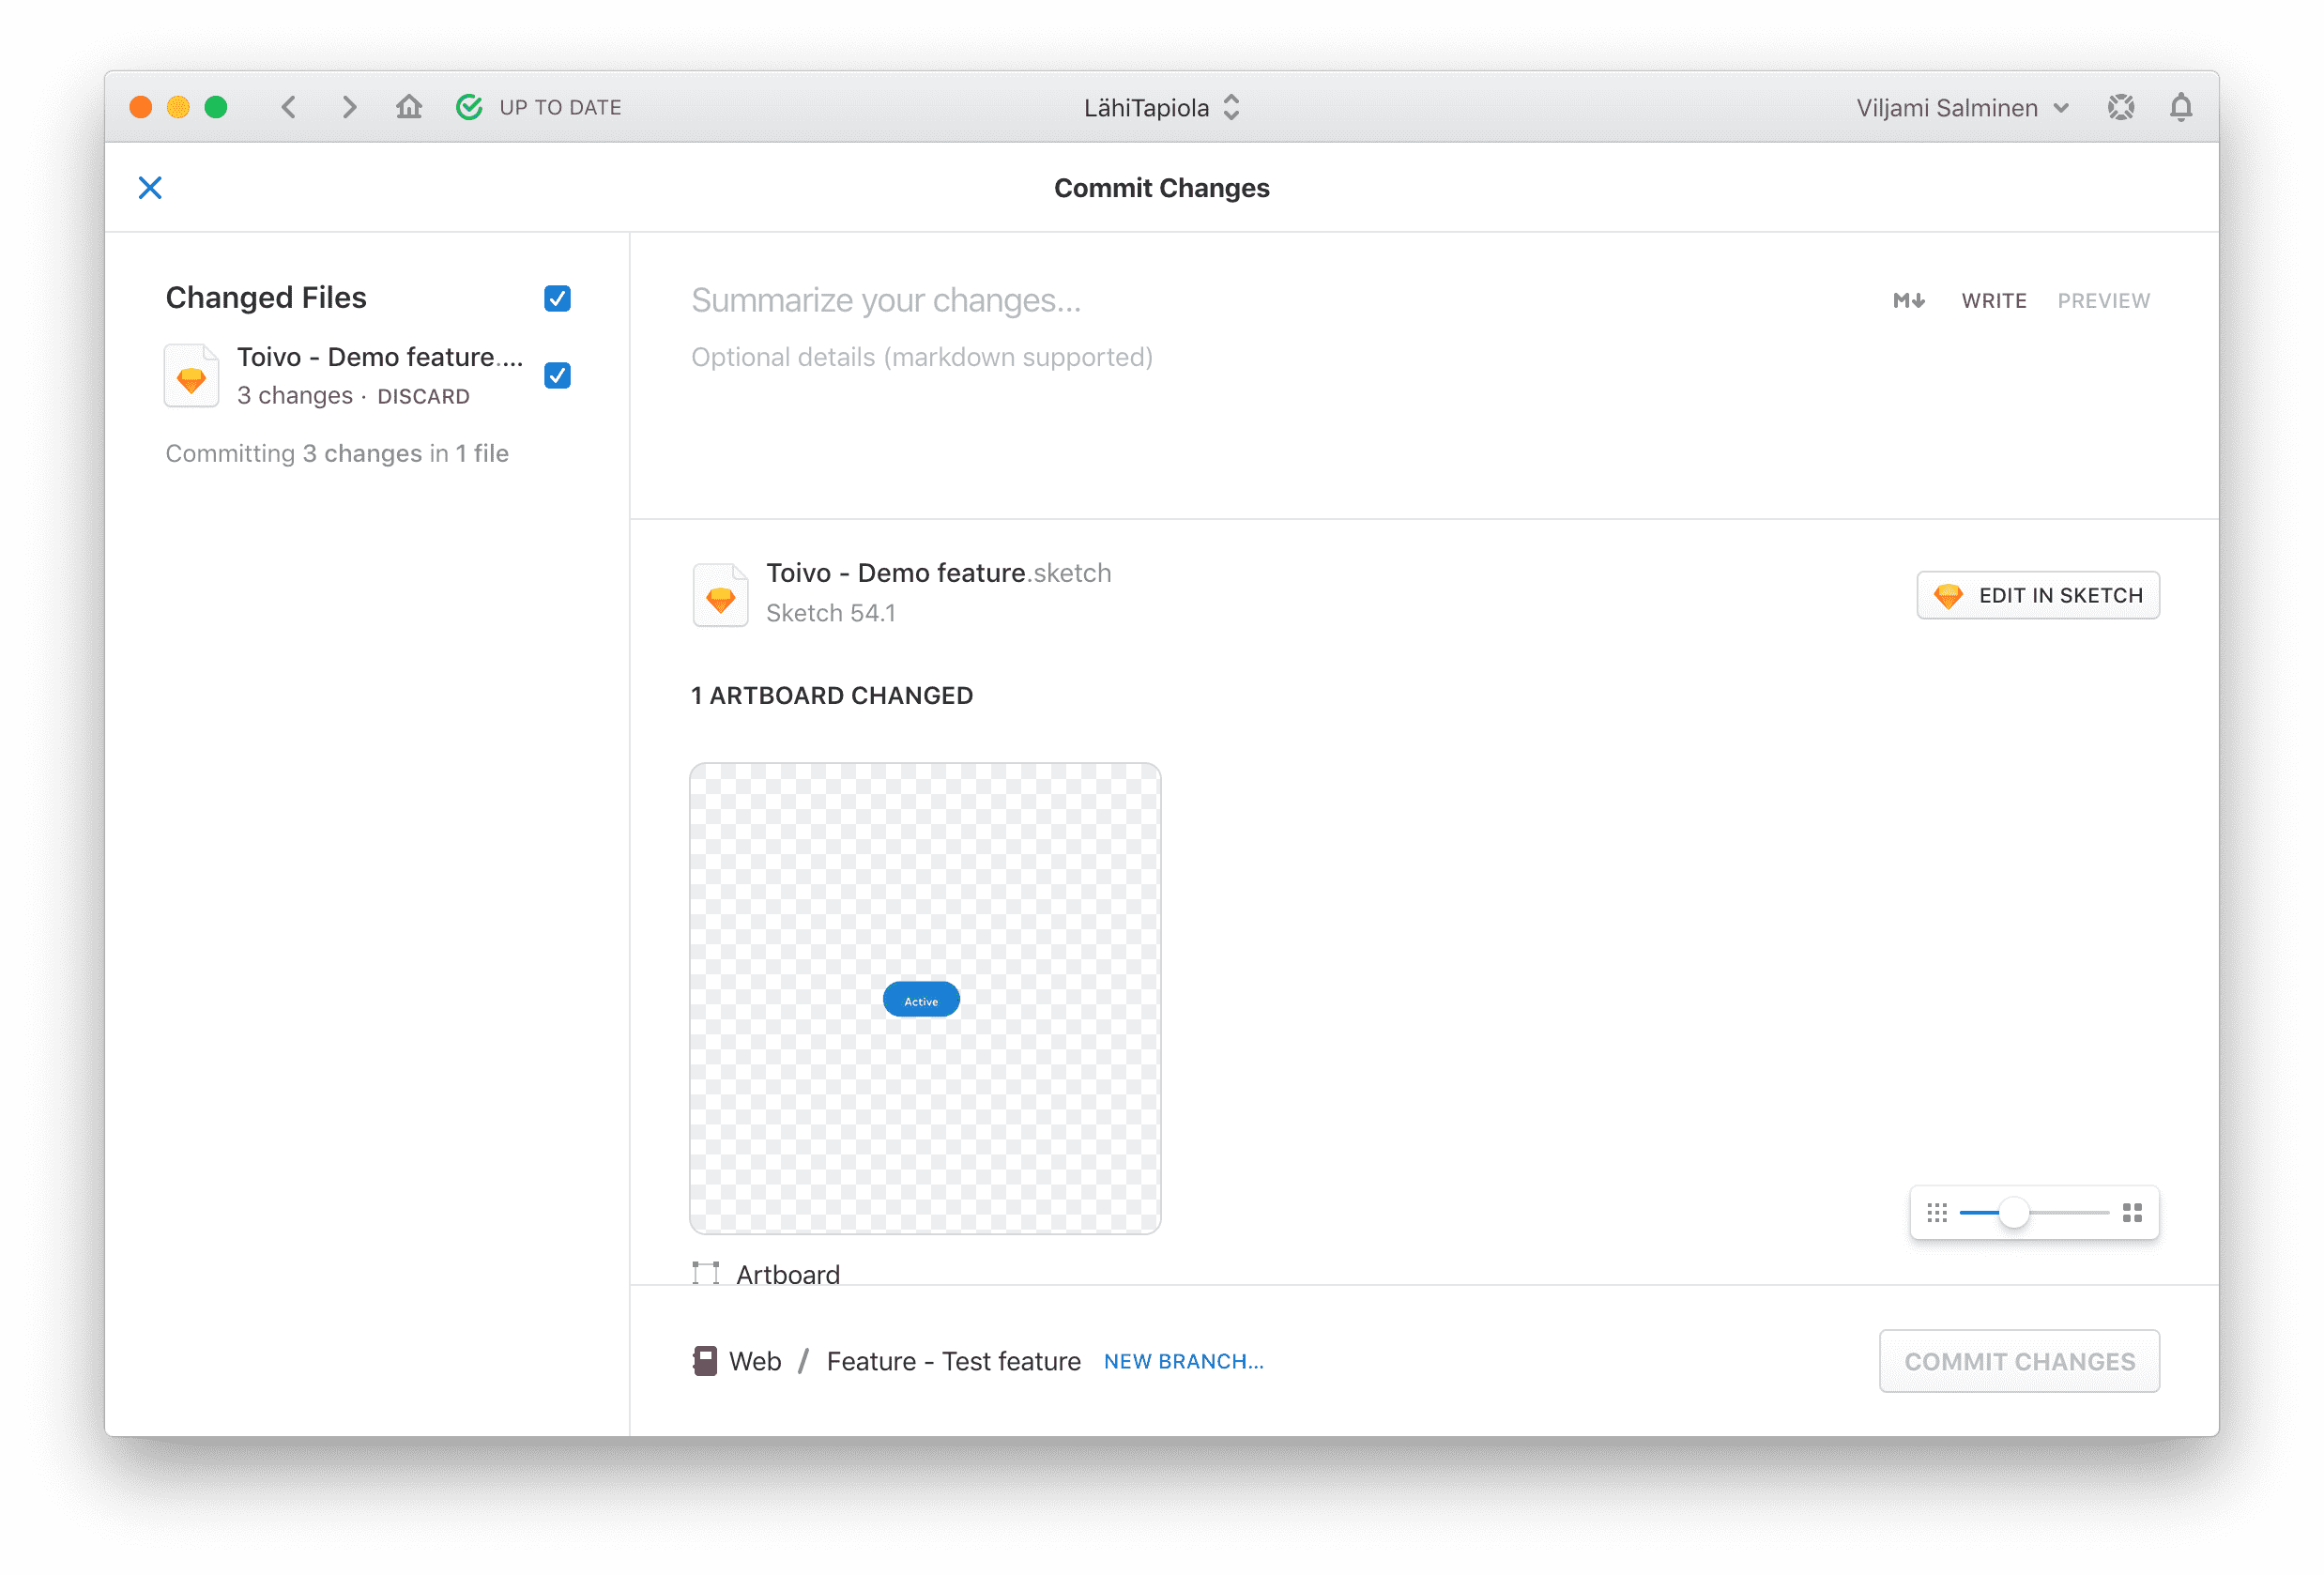
Good commit messages are concise and descriptive. They usually start with a few key verbs (updated, removed, fixed, added, and so on) and then list the names of the items where the work was done. Here are a few examples:
- Added second version of onboarding flow with photos
- Fixed copy on About page
- Updated banner on profile to match standards
- Created boilerplate wireframes for the delete flow
- Removed old modal explorations
Once finished naming, click “Commit Changes” to save your commit and to return to your branch’s overview.
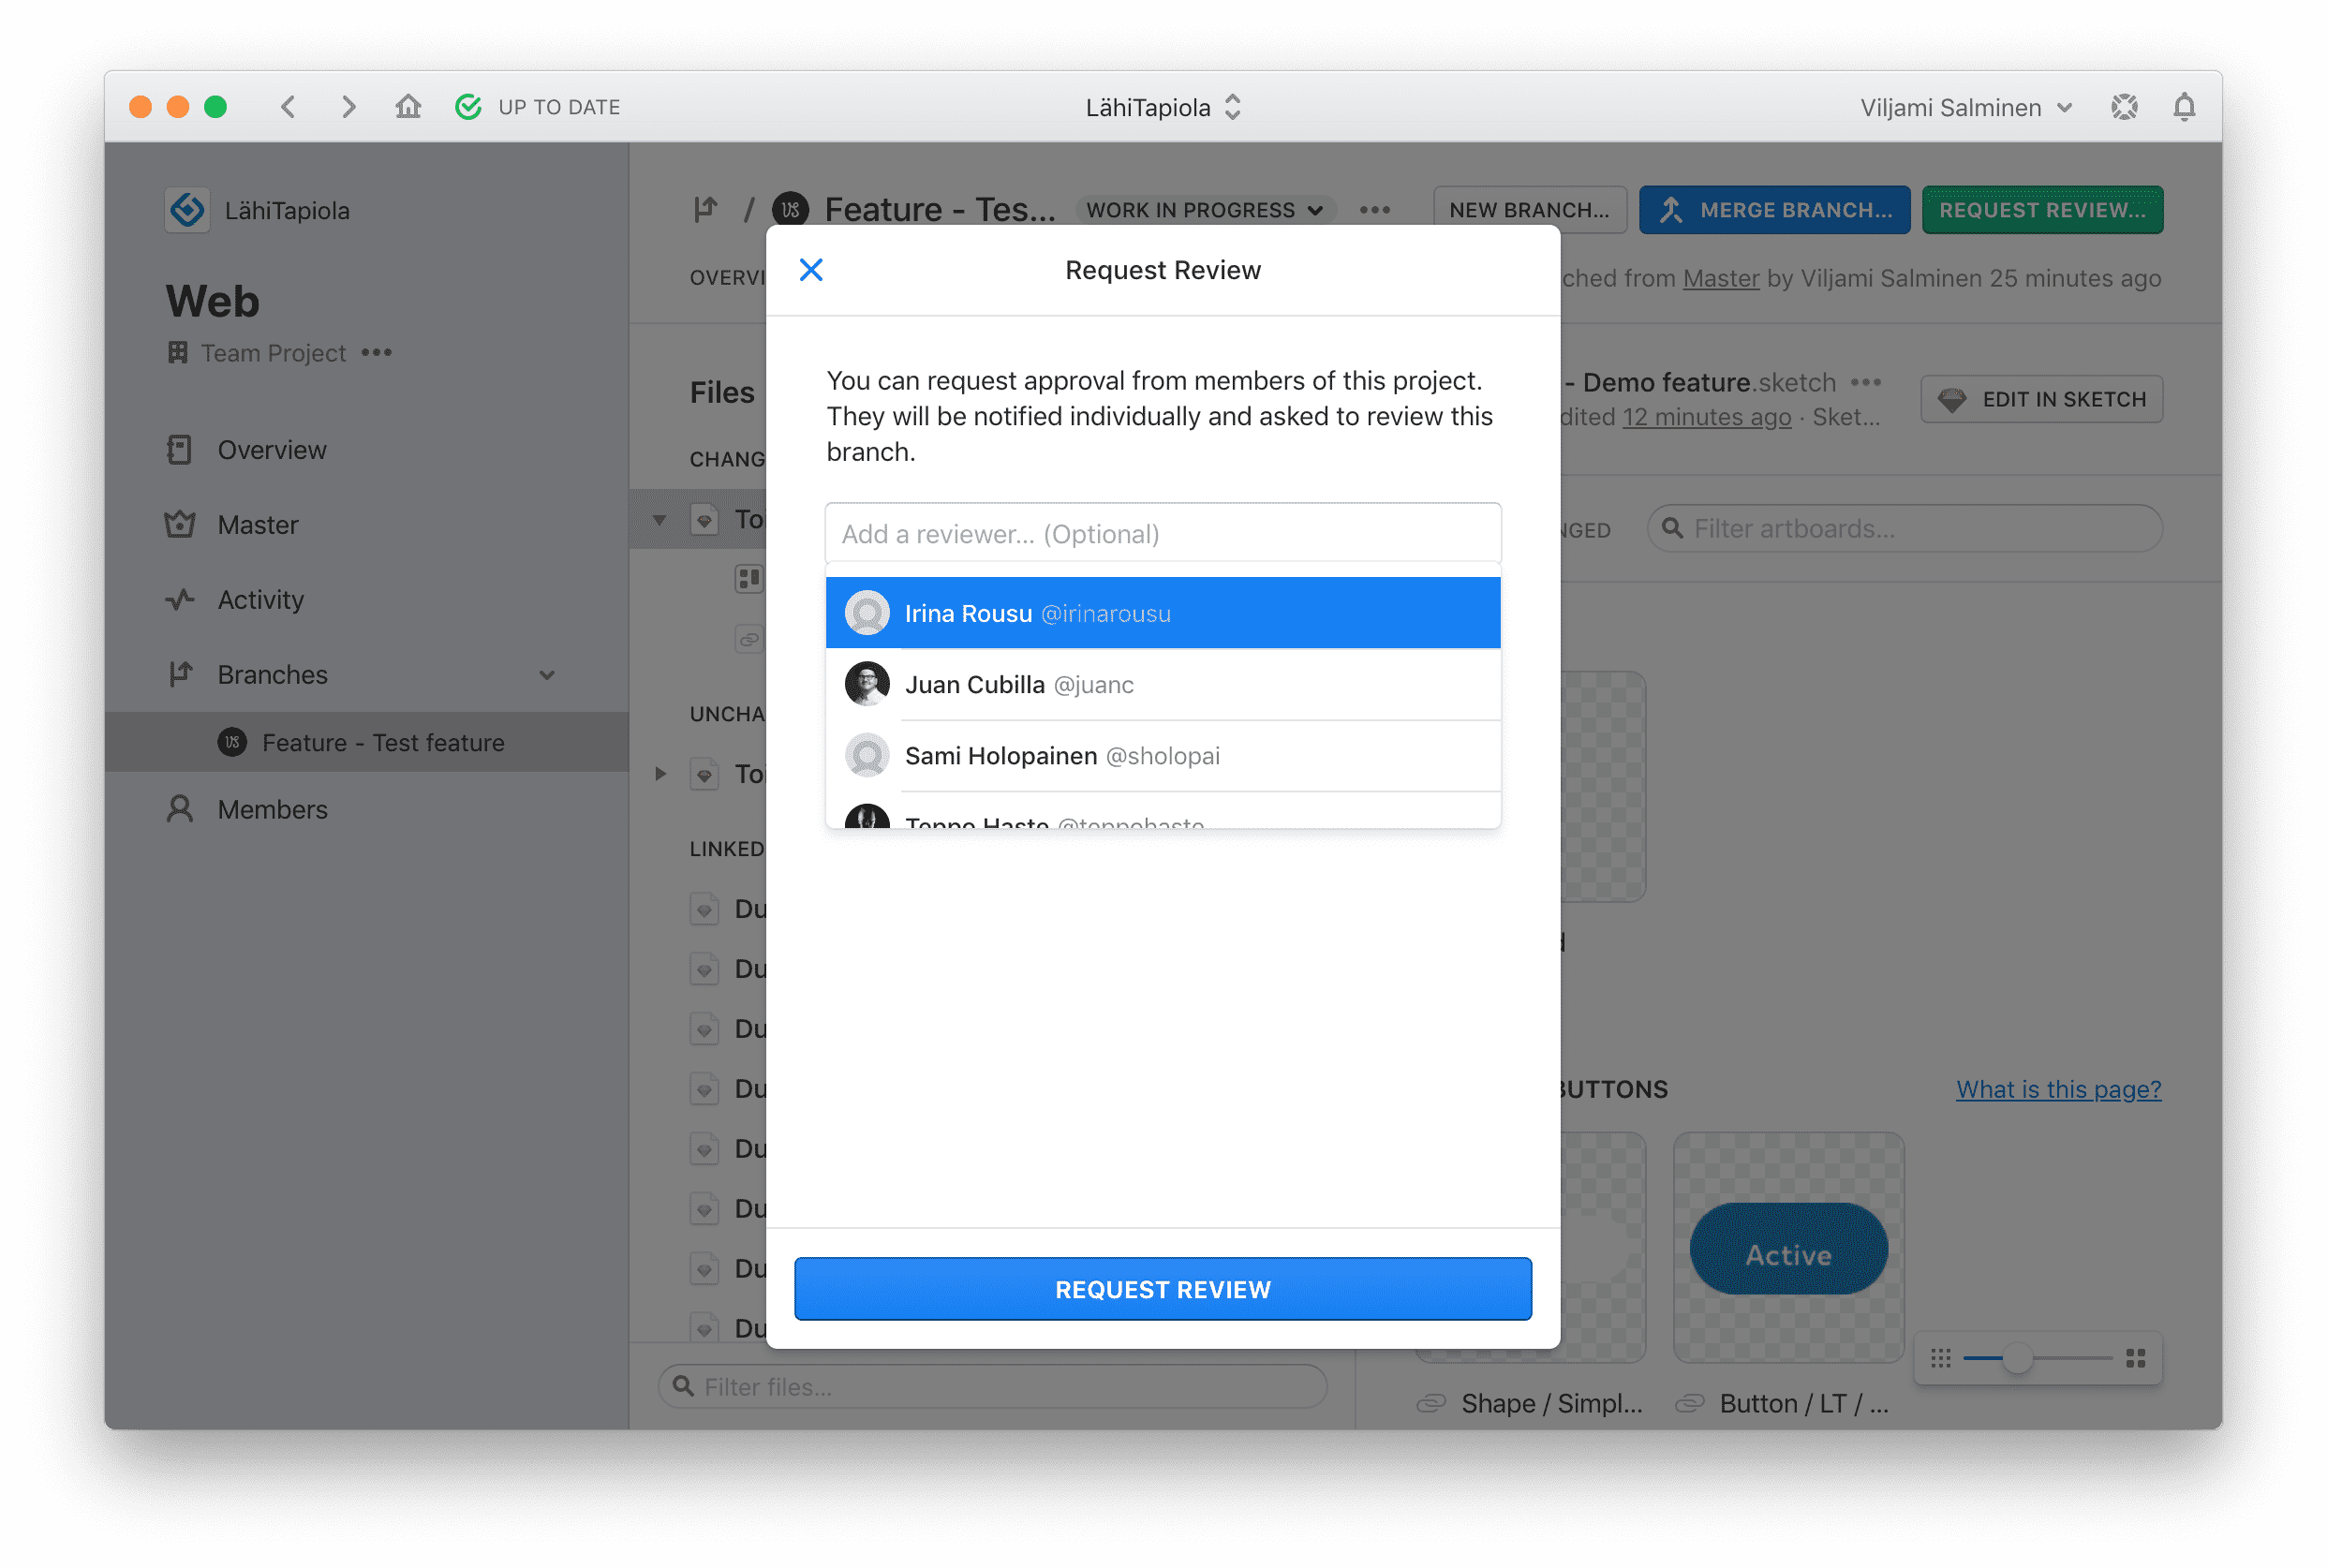
7. Request design review #
Committing changes to your own branch does not affect Master. You can consider “Master” as the single source of truth for other team members. Before merging to Master, you should always request a design review.
When you think a feature is ready, request a design review by clicking “Request Review” in your branch and choose at least one person as the reviewer.
Once the changes have been reviewed and approved, you can merge your changes to Master. To do so, click “Merge Branch…” in the top right corner. This opens up a modal that allows you to summarize the changes done in your working branch.
The description is optional and can be left blank.
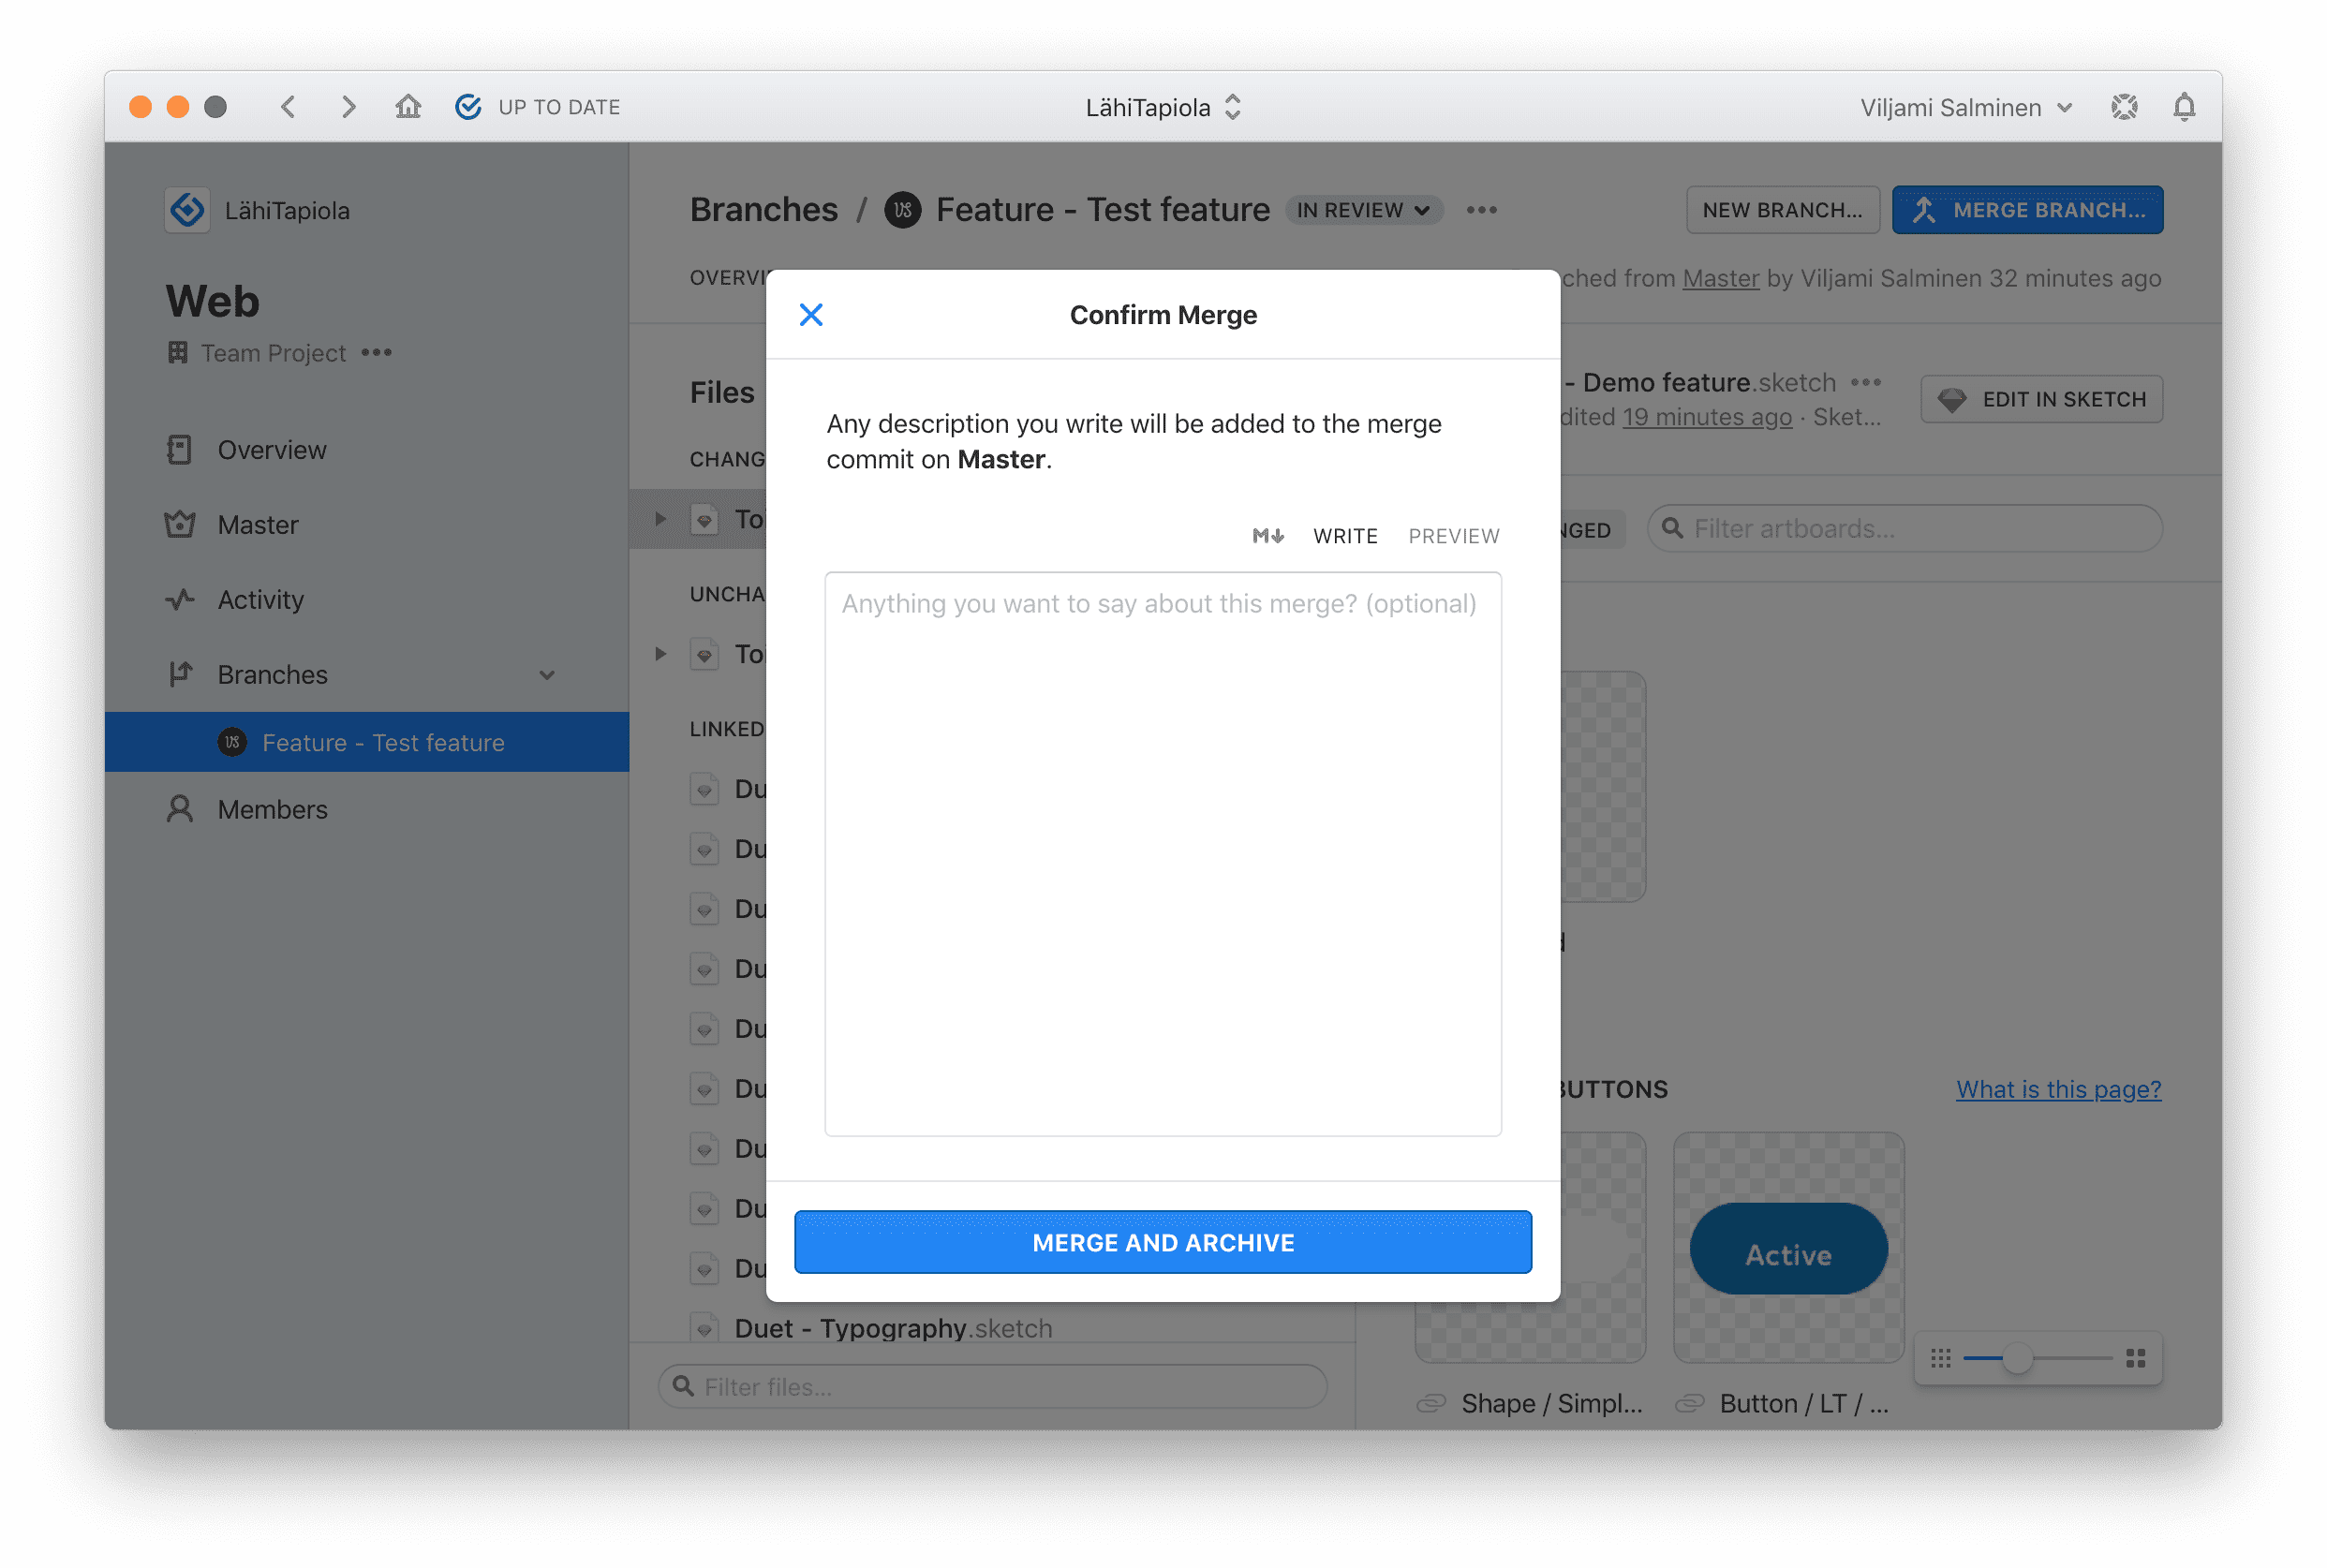
Clicking “Merge and Archive” brings all your separate edits together in one place, the Master, and finally archives the branch. If needed, the archived branch can still be reviewed or revived later.
8. Getting support #
Abstract has an extensive documentation covering any issues you might face, which is why we recommend searching their docs first. If you still can’t find an answer, we’ve also created a Slack channel to get support.
Finally, emails sent to our support address will be addressed by the Duet team as quickly as possible.